
Using small delays in C with SDL ticks
 Running a game at 60 frames per second means that handling things like key presses can be interesting. In the game, I call various SDL functions and via a giant switch statement set flags. Then later in the game loop, those flags are used to determine actions
So if you press Q to rotate the player ship anti-clockwise (counter-clockwise to yanks!) without some limiting thing, it would whizz round through 900 degrees each second. (There are 24 rotation angles for the ship, each 15 degrees. 60 x 15 = 900) .
I use a very simple technique to limit it. SDL has a function called SDL_GetTicks that returns the number of ticks since SDL was initialized in the game, i.e. when it started running. A tick is 1/1000th of a second, i.e. a millisecond. By calling this function twice, you can measure a time period. It’s not as precise as the nanosecond CPU clock that I use but for the kind of delays I’m talking about it is more than sufficient.
This is the code that is called each frame in the game loop.
void RotatePlayerShip() {
	if (rotateFlag && (SDL_GetTicks() - rotTimer > 40)) {
		rotTimer = SDL_GetTicks();
		if (rotateFlag == 1) // CounterClockwise
		{
			Player.dir += 23;
			Player.dir %= 24;
		}
		else
			if (rotateFlag == 2) // Clockwise
			{
				Player.dir++;
				Player.dir %= 24;
			}
	}
}
Because the game loop syncs to the vertical fly-back, the time between two successive calls of this would be about 16.666 milliseconds. (=1000/60), but the check to see if 40 ticks have passed slows it down to 25 x 15 = 375 degrees rotation per second, i.e. just over one complete revolution which is more manageable than 900/360 = 2.5 full rotations. Plus if you wish rotation speed to be faster just change the 40 to a lower value.
This measured time delay is used quite a few times in the game. You could use it as a means to make the game get harder by having shorter delays on say aliens moving or firing.
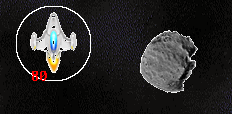 In the asteroids game, when you press the s button to put up a shield, it draws a circle. I must confess, I didn’t know how to draw a cuircle so looked it up and found an example on StackOverflow. You can use code from
 The traditional way of using an include guard is to put all of the header inside a #ifdef like this.
 that you can try are based on Linux but there are a few that aren’t.
 I’m changing horses in midstream so this won’t appear as it’s been done so far. Rather than let it go to waste, I’ll be publishing it in parts here. My next book will be Learn C Games Programming on the Raspberry Pi.
 This was a text mode game, my idea being to do something like the old Star Trek BASIC game but better. I called it Star Empires and it’s on GitHub, just follow the link to GitHub on the C Games sources link.